
How to Install Linux on VirtualBox
There are hundreds of different kinds of distros (for example Kubuntu, Ubuntu, Fedora, Linux Mint, etc) in the Linux world. There are many users who want to try out or learn the multiple distros. And using it in the main machine will need multi-booting, which is a kind of complex thing to do, instead of going through this pain users can easily use VirtualBox for trying out different kinds of Linux distros. So, the most efficient advantage of using VirtualBox is users can use different kinds of Linux distros on the same hardware, without multi-booting for switching between distros.
Now here we are going to show how to install FEDORA on VirtualBox as we already know FEDORA is one kind of Linux distro. The steps are given below:
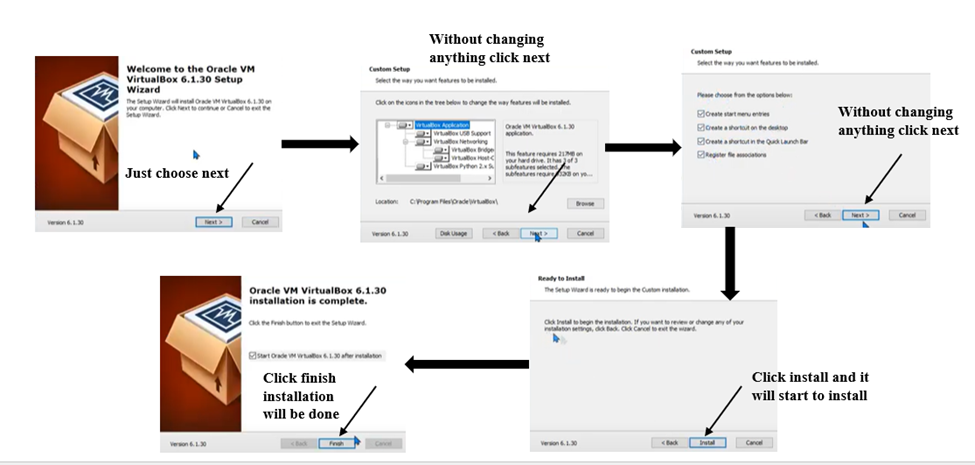
| 1. VirtualBox Installation: ~If in your machine you don’t have VirtualBox installed, then first you need to download it from the website of VirtualBox (virtualbox.org). ~Going to the website then you need to go to the Downloads section and choose the file according to your machine’s operating system. If you are using Windows, you are going to choose the Windows host. ~And then open the file and install it into your machine by following the steps. | 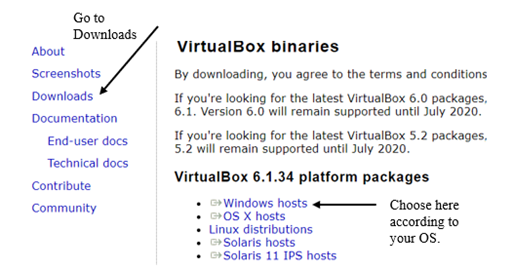 |
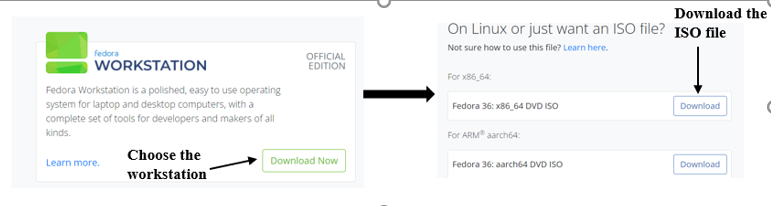
| 2. FEDORA installation on VirtualBox: ~ First go to the website of Fedora (getfedora.org). then choose a workstation and download the Fedora ISO file. |
 |
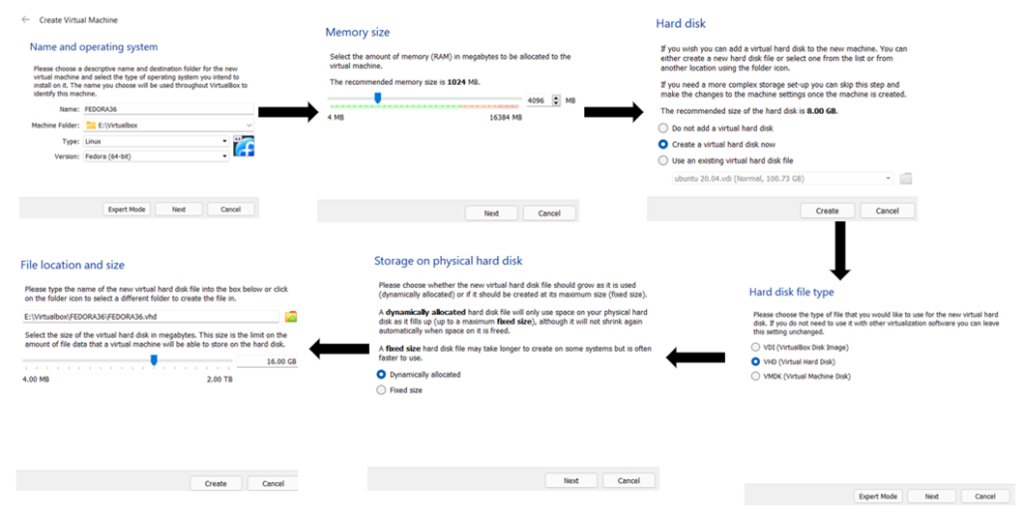
| ~ After downloading the Fedora file. Open VirtualBox and create new for creating new virtual machines. Then give a name to the new operating system, here we are giving it the name FEDORA36. Then give the machine folder path, type (Linux) and versions (Fedora-64bit), and then click Next. ~ After that it will ask you to allocate memory for your new OS. Here we are allocating 4GB (4096MB) and then click on next. ~ Then we are going to choose to create a new hard disk and click Create. ~ After that it will tell you to choose the type of hard disk. Here we are going to choose VHD (virtual hard disk) and then click on Next. ~ Then we are going to choose dynamically allocated for storage on the physical hard disk and click on Next. ~ After that it will show file location and hard disk size. Check the file location and give a size for the hard disk. We are giving it size 16GB and click on Create. After that, we will see it has been created as a Virtual Machine |
 |
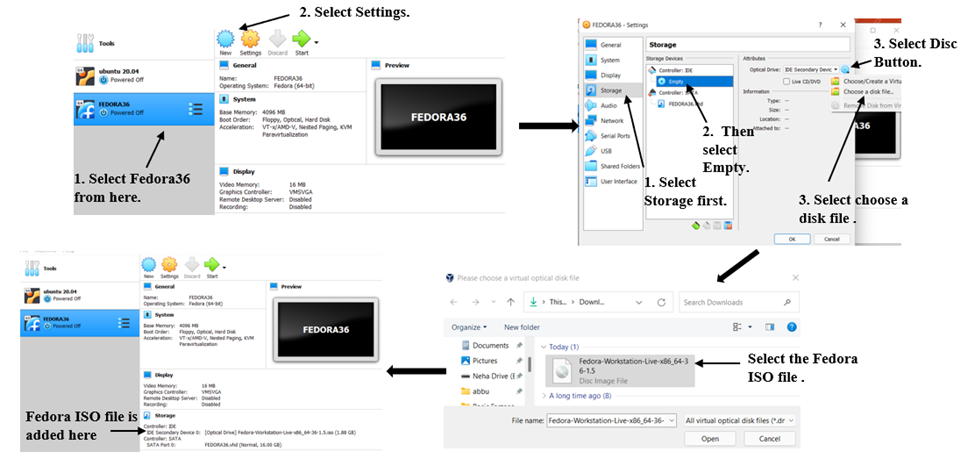
| ~ Now we are going to attach the Fedora ISO file, select Fedora35 from the left menu and go to settings. Then open storage there will be Empty under the Controller:IDE. Then click on the disc button on the right and click on choose a disk file, chose the downloaded Fedora ISO file, and click OK. |
 |
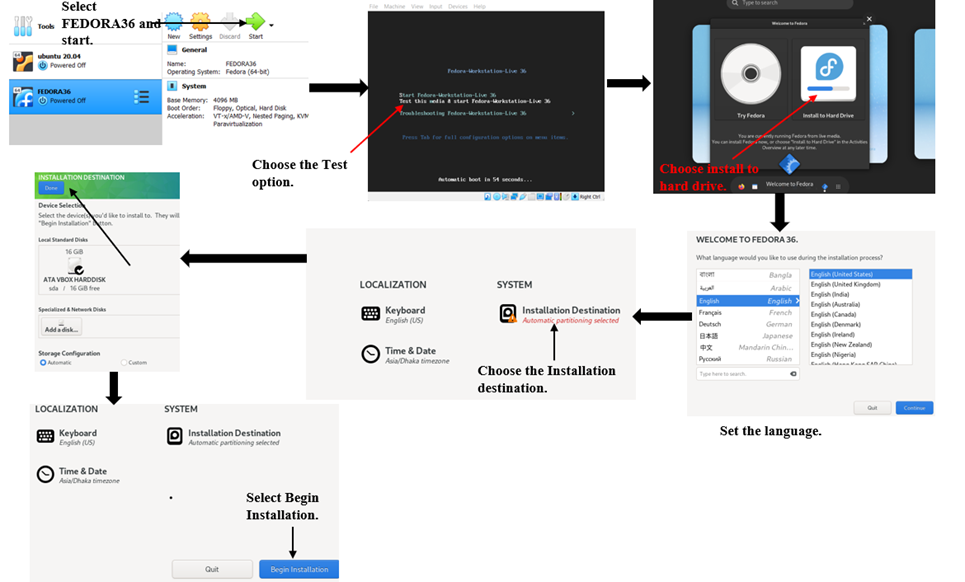
| ~ After clicking OK, start the FEDORA36. Then choose Test option and wait for it to open. After opening choose install to the hard drive and set the language and click on Continue. Then select Installation destination, without making any change just click Done. And then click on Begin Installation. |
 |
| ~ After successfully installation we have to reboot it, but before rebooting go to the virtual box. Click on the file of Controller: IDE of storage and select remove the disk from virtual drive. And then it will show a question box, their select force unmount. Then click on finish Installation. |
 |
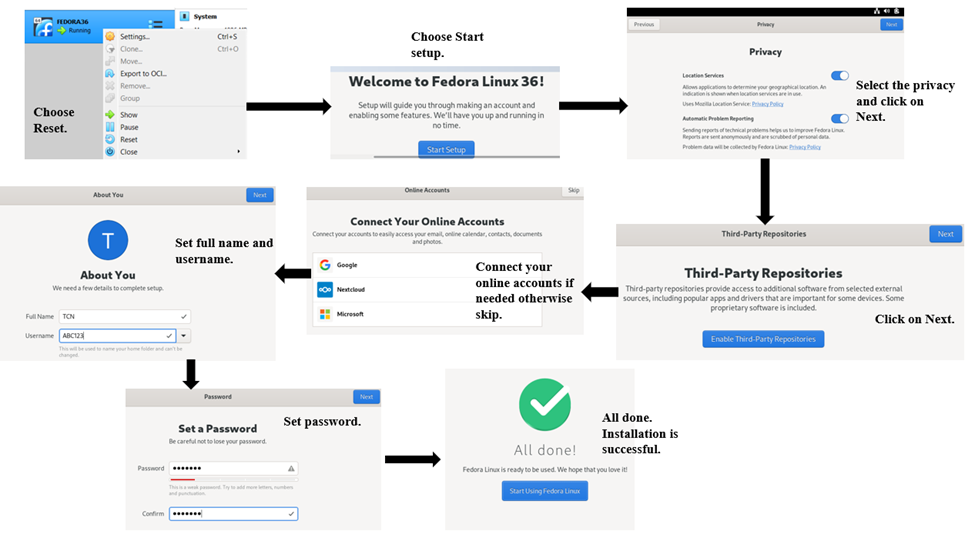
| ~ Then right-click on FEDORA36 and click reset. Then it will open a setup window, and click on Start setup. After selecting the privacy option click on Next, then it will ask if we want to add third-party repositories. If you want to then enable it or otherwise click on Next. Then add your online accounts, here we are skipping it. Then it will ask for your full name and username, give it as your wish. After that, it will ask for a password and set a password. Then all be done, just click on start using Fedora and your installation of FEDORA in VirtualBox will be successful. |
 |
